Tiny Felt Bunnies

2023 is the Year of the Rabbit! (Do you know any Rabbits?) I love stitching bunnies and have made several variations over the years, but when the idea to stitch these tiny cuties hit me one day, I couldn't ignore it. I started stitching tiny bunnies right away and I couldn't stop! (15 are better than 1, right?)
Of course I'm sharing the tiny pattern and free tutorial with you, they are so cute and fun to make. Whether you choose to make just 1, or 100, you'll love stitching these tiny bunnies.

Step 1: First, print the pattern PDF (you can download that right here) and cut out your felt pieces.

Step 2: Line up the ears and tuck the ends in between the two side body pieces. Stitch around the curved edge using the Whip Stitch, stitching the ears in place as you go.
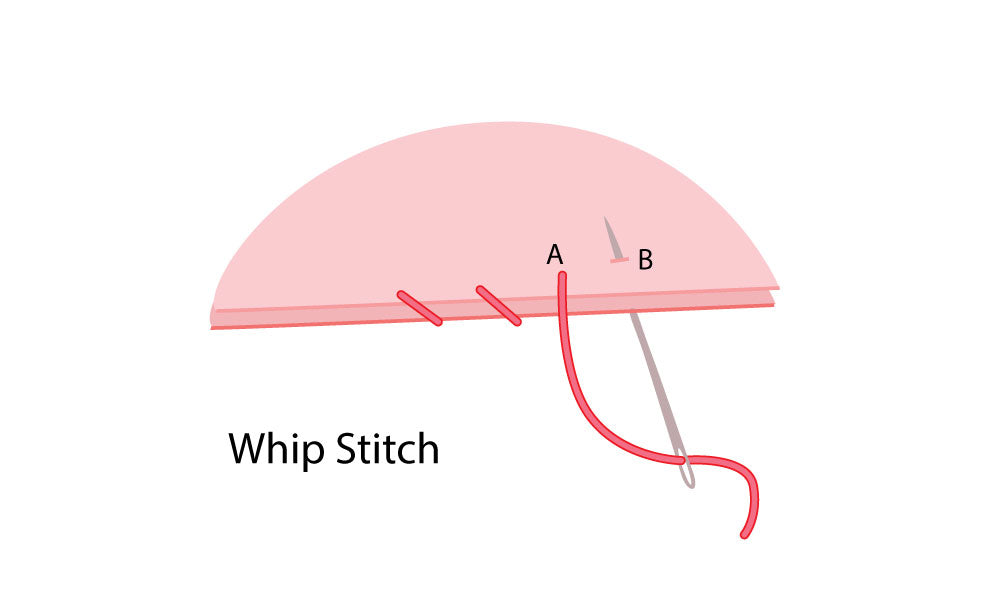
For the Whip Stitch, below, begin with a knot in between the felt layers, bring the needle and thread out at A, over the edge and back up through at B.

Step 3: With the bottom still open, get some pink floss (2 threads) and stitch the eyes on either side and the nose over the seam at the corner. These are stitched with the Satin Stitch, just 3-4 tiny stitches right next to each other.

Step 4: Now line up and attach the bottom piece with the Whip Stitch. Leave a space open at the back end.

Step 5: Stuff your bunny. I like to use cut up felt scraps for really tiny things, they're easier to stuff inside than fluffy stuffing! Now tuck the tail piece inside with the round end sticking out and sew up the hole.

Step 6: Use your needle to scratch the felt of the tail to make it fuzzy!

All done! Did you know that a bunch of wild bunnies is called a Fluffle?? I hope you have fun creating your own cute, tiny fluffle.
Happy Stitching!


